Monday, September 28, 2009

Alpine iXA-W407 with NVE-M300

Alpine has recently unveiled its newest 2-DIN receiver, the iXA-W407 Digital Media Station. The iXA-W407 features fully supported iPod/iPhone playback (there’s no CD drive), large 7-inch QVGA touch screen display, built-in Bluetooth and more. The iXA-W407 is available as an all-in-one audio/video/navigation system package that includes the NVE-M300 GPS Navigation Drive. This all-in-one AVN package from Alpine will cost $1100.


iXA-W407+NVE-M300

iXA-W407 boasts a 7-inch QVGA display, an AM/FM tuner and a high-speed USB input for optimal iPod/iPhone connection. You can also connect USB memory devices and MTP-based MP3 players via the USB input.

The iXA-W407’s navigation is provided by the Alpine NVE-M300 GPS Navigation Drive. This is a compact external drive that is installed somewhere hidden and the location services include regular GPS data, solid-state gyro sensor technology, and accelerometer technology to gauge the vehicle’s speed for even more accurate navigation. It obviously does voice guided directions which are played through the audio system.

Some other features of NVE-M300 include:

  • Text-to-speech
  • Lane assistance where available
  • 6 million unique POIs
  • Preloaded NAVTEQ maps of the United States and Canada, including Alaska, Hawaii, Puerto Rico and the Virgin Islands

You can also purchase the two devices (iXA-W407 and NVE-M300) separately in which case it would cost $800 and $450 respectively.

What Is It Called?

1. The practice of eating insects is called entomophagy.
Most insects are edible. There are 1,462 recorded species of edible insects. And
they're quite nutritious. For instance, 100 grams of cricket contains only 121
calories, less than half of beef. A cricket contains only 5,5 grams of fat, compared
to 21,2g of beef. Beef contains more protein (23,5g - a cricket 12.9g) but the 100g
of cricket also contains 5,1g of carbohydrates, 75,8 mg calcium, 185,3 mg
phosphorous, 9,5 mg iron, thiamin, riboflavin, and niacin.


2. Mid-men, the male versions of mid-wives, are called accouchers.


3. The working section of a piano is called the action.


4. The plastic things on the end of shoelaces are called aglets.


5. The distance that a place holder falls from a glass when it is lifted (you know,
place holders sometimes get stuck to the bottom of a cold glass when you lift the
glass) is called a bevemeter.


6. The study of creatures such as Bigfoot, the chupacabra, and the Loch Ness monster is
called cryptozoology. Zoologist Bernard Heuvelmans coined the term to describe his
investigations of animals unknown to science.


7. The apparatus used in alcohol distilleries for freeing the spirit from water is
called the dephlegmator.


8. One that speaks two languages - is bilingual - can be said to be diglot.


9. Ducks are never male. The males of the species are called drakes.


10. Shoemakers are commonly called cobblers but correctly speaking a cobbler is a shoe
repairmen. A shoemaker is a cordwainer.


11. The device at the intersection of two railroad tracks to permit the wheels and
flanges on one track to cross or branch for the other is called a frog.


12. A specific length of thread or yarn according to the type of fiber is called a hank.
For linen, a hank is 274 metres (300 yards); for cotton, it is 768 metres (840 yards).


13. The white part of your fingernail is called the lunula.


14. The thin line of cloud that forms behind an aircraft at high altitudes is called a
contrail.


15. A depth of 2 fathoms (3,6 metres) is called a Mark Twain. Originally a fathom was the
space reached by with two arms outstretched.


16. In the early days of film making, people who worked on the sets were called movies.
The films were called potion pictures.


17. The tendency of the leaves or petals of certain plants to assume a different position
at night is called nyctitropism.


18. The back of the human hand is the opisthenar.


19. Someone who uses as few words as possible when speaking is called pauciloquent.


20. People that study fish are called ichthyologists.


21. The pin that holds a hinge together is called a pintle.


22. The gland responsible for producing the hormone that regulates growth is called the
pituitary gland. It is the size of a pea.


23. A melody is a group of notes in a certain order that results in a sweet or agreeable
sound. An easily remembered melody is called a tune.


24. Compulsive shopping was identified by a German psychiatrist almost a hundred years
ago. Clinically it is known as oniomania. Shopaholics are the people who do not
suffer from chrematophobia, which is the fear of touching money.


25. In early France the distance a man could walk while smoking one pipeful of tobacco
was called a pipee.


26. The central shaft of a bird's feather which bears the vane or web of the feather is
called a rachis.


27. The small cup in which an espresso is served is called a demitasse.


28. A philologist studies linguistics and etymology.


29. The hairless area of roughened skin at the tip of a bear's snout is called the rhinarium.


30. Someone who habitually picks their nose is called a rhinotillexomaniac (rhino = nose,
tillexis = habit of picking at something, mania = obsession with something)


31. A building in which silence is enforced, like a library or school room, is referred
to as a silentium.


32. The ear-splitting sound produced by the high notes of a bagpipe is called a skirl.


33. The fleshy projection above the bill on a turkey is called a snood.


34. People who chase after rare birds are called twitchers.


35. gills of ale and beer is 1 pint, 2 pints = 1 quart, 4 quarts = 1 gallon, 9 gallons
= 1 firkin, 2 firkins = 1 kilderkin, 3 kilderkins = 1 hogshead, 2 hogsheads = 1 butt.

Microsoft says Google Chrome Frame makes IE less secure


Microsoft: Google Chrome Frame makes IE less secure The release of Google Chrome Frame, a new open source plugin that injects Chrome's renderer and JavaScript engine into Microsoft's browser, earlier this week had many web developers happily dancing long through the night. Finally, someone had found a way to get Internet Explorer users up to speed on the Web. Microsoft, on the other hand, is warning IE users that it does not recommend installing the plugin. Ars Technica


Microsoft DRM patent could revive peer-to-peer music nets Here's an odd twist that might give new life to the dying horse of music digital-right management. Microsoft has just been awarded a U.S. patent for a distributed DRM system -- it works over peer-to-peer networks -- which uses encrypted public and private keys as the licensing mechanism.InformationWeek

Up to 9 percent of machines in an enterprise are bot-infected In a three-month study of more than 600 different botnets found having infiltrated enterprise networks, researchers from Damballa discovered nearly 60 percent are botnets that contain only a handful to a few hundred bots built to target a particular organization. Dark Reading

AT&T says Google Voice violates net neutrality principles AT&T is playing a "gotcha" with Google. The big phone company filed a letter with the Federal Communications Commission Friday saying the Google Voice calling system violates the commission's network neutrality principles. The New York Times

Hackers pay 43 cents per hijacked Mac A network of Russian malware writers and spammers paid hackers 43 cents for each Mac machine they infected with bogus video software, a sign that Macs have become attack targets, a security researcher said yesterday. ITworld

Intel inside? Try Intel everywhere At a major conference in San Francisco this week, Intel showed how it is squeezing more functions of a personal computer into fewer chips, answering the call for smaller, more mobile devices. The New York Times

Survey: Half of businesses don't secure personal data The personal information you give to businesses may not be as secure as you hope, according to a new survey. CNET


STRONG wiener-weiner

Another pathetic snap shot of something truly pathetic or weird:

Wiener Building: What a STRONG wiener-weiner. Wondering what he's exercising next?

"Wiener Building: What a STRONG wiener-weiner. Wondering what he's exercising next?..."


Big Fish


stranges-world

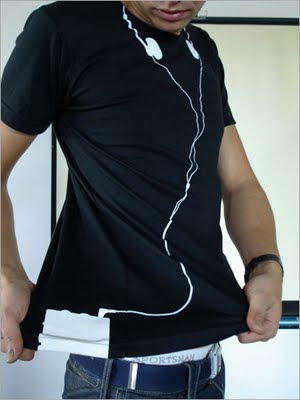
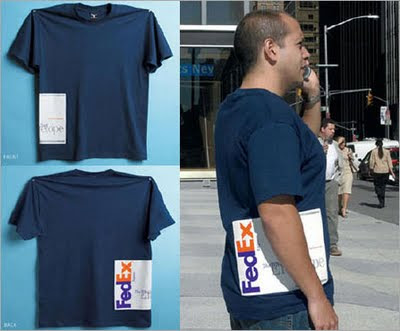
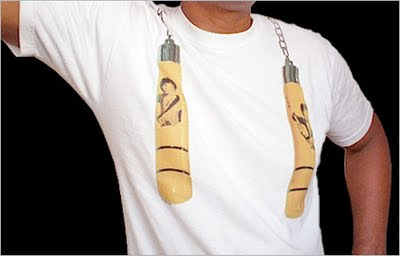
Creative & unique t-shirt's

Creative & unique t-shirt's @ strange world


Creative & unique t-shirt's @ strange world

Creative & unique t-shirt's @ strange world


Creative & unique t-shirt's @ strange world

Creative & unique t-shirt's @ strange world

Creative & unique t-shirt's @ strange world

Creative & unique t-shirt's @ strange world


Creative & unique t-shirt's @ strange world

Creative & unique t-shirt's @ strange world

Creative & unique t-shirt's @ strange world

Creative & unique t-shirt's @ strange world

Creative & unique t-shirt's @ strange world


Monday, September 14, 2009

Naked wedding

A New Zealand radio station is on the hunt for a couple willing to bare all in their marriage ceremony.

The Edge is offering a couple a wedding worth $50,000 – so long as when they say "I do" they are both naked.

Radio station to host naked wedding


They will win an extravagant wedding on the new multi-million dollar Ipipiri overnight cruise ship, which sails around the Bay of Islands.

This is the fourth marriage set up by The Edge but the first to have this cheeky twist.

Jay-Jay Feeney of The Edge's Morning Madhouse show said the previous three marriages had been very successful.

The last three couples were still married and have since had children, she said.

Interested couples can enter the latest contest online attheedge.co.nz and the five finalists will be announced on September 7.

The public will then vote for the winning couple, who will be announced on September 14.

-www.stuff.co.nz


Friday, September 4, 2009

Build A Real Time Audio Studio

Although it might not seem like it, properly dealing with audio requires an intricately tuned PC. The main issue is audio latency, which refers to both the time it takes for a sound to enter your machine and the time it takes for your machine to produce a sound. In everyday use, we don’t really notice this latency. When you click on a button that makes a beep, you don’t care that it might take several hundred milliseconds for the sound to reach your ears. But in the delicate world of audio engineering, several hundreds of milliseconds is far too long, and even a delay of just tens of milliseconds is undesirable.

Most professional systems will try to reduce audio latency to less than 10 milliseconds – faster than the average seek time on most hard drives. Some systems will get it down as low as 2 or 3ms, enabling them to process vocals and instruments in real-time, play software synthesizers just as they would the physical type, and mix and master recordings with the same near-zero latency as an analogue tape machine.

On Windows systems, this low-latency is produced by the ASIO driver framework that’s used by many pro-level audio cards to communicate with apps like Steinberg’s Cubase and Ableton’s Live. On OS X, however, a low latency audio framework is built into the operating system, and it’s a similar case with Linux.

ALSA, or the Advanced Linux Sound Architecture, sits within the Linux kernel itself as a series of hardware drivers. Audio data is passed from ALSA to the user-level applications that manipulate the audio. But despite this low level integration and a built-in potential for good low latency performance, most default Linux installations make poor audio production computers. That’s because there’s still too much going on in the background, and too many throwbacks from the time when Linux was designed primarily for server installation.

Luckily, Linux is a highly configurable operating system, and this means that you can create the perfect audio platform just by making a few tweaks. We’ve chosen the latest version of Ubuntu to be our guinea pig.

Get a real-time kernel

The key to getting audio latency as low as possible is to remove all obstacles to a fast response time, and the place to start is with the kernel. The Linux kernel is made up of a series of modules that huddle together to form the monolithic chunk of functionality. Some of these modules are designed to provide super-low latency operation, but they can have unwanted side-effects for general computer use. As a result, these modules are rarely enabled by default.

These real-time kernel enhancements were introduced to the mainstream kernel several years ago, and together they can have a massive effect on how your system handles audio processing. Without the real-time enhancements, the kernel can respond to an interrupt within about 600 milliseconds. With the enhancements enabled, that time is reduced to around 20 milliseconds. Those numbers might seem minute, but they can have a dramatic effect on your audio latency when your system’s kernel is dealing with hundreds of interrupts a second.


We wouldn’t advise installing the real-time kernel enhancements onto a machine you need to rely on, though. They’re disabled simply because they’re unstable. Happily, however, both sets of the kernel can coexist within the same Linux installation: you simply choose which to use from the Grub boot menu.

In Ubuntu, the real-time kernel can be installed through the package manager just like any other addition. Search for ‘linux-rt’ and install both the main package and the ‘linux-headers-rt’ package that appear. Both of these packages, and the resulting dependencies, are from the Multiverse repository. This means that they’re unofficial and won’t be covered by any security patches, but they are actively maintained by a third party.

Install audio software

After the kernel has been installed, you will need to restart your machine. When you get to the brief Ubuntu boot menu, press [Escape] to get to the Options screen. From here, you can choose between your standard kernel (most probably labelled ‘-generic’) and the real-time version we’ve just installed (labelled ‘-rt’). Choose this and press [Enter] to boot into the real-time environment. This is the point where the new kernel may cause some problems. As it’s responsible for all of the hardware connected to your PC, everything will need to be re-detected. On our test machine, for example, the display’s native resolution wasn’t correctly detected and we needed to fix this manually. If you use proprietary drivers, such as those for Nvidia hardware, you will have to make sure that these have been reinstalled. Ubuntu’s package manager should have grabbed the restricted modules to do this automatically, but if not, you’ll need to install the driver manually.

Now that you’ve got a working low-latency desktop, it’s time to install the audio production environment. Ubuntu’s package manager makes this easy. Just search for ‘ubuntustudio-audio’ in Synaptic, and install the resulting package. This includes the cream of Linux audio software and gives you everything that you need to get started with your low-latency audio environment. After those packages have installed, there are a couple of housekeeping tasks to perform. First, load up the User Manager from the System menu, and add any user that you want to have access to the low-latency audio features to the ‘audio’ group. This should also include your user account. Secondly, add the following two lines to your ‘/etc/security/limits.conf’ file using administrator privileges:

@audio - rtprio 99
@audio - nice -10

When you’ve finished, restart your machine, and don’t forget to choose the real-time kernel from the Grub boot menu. It’s now time to play with some audio software.

Configure Jack

The tool at the heart of the Linux audio system is called Jack – the Jack Audio Connection Kit. Jack sits on top of the ALSA layer and dynamically pipes audio to and from a series of inputs and outputs. It’s a very clever solution to an age-old problem: routing audio input to your soundcard from one application to another before it makes its way to an audio output like your headphones or speakers. Jack does this without adding any latency. It’s been such a success on the Linux platform that you can now find it doing the same job on OS X.

Before we can dive into things, though, we need to get the service started. Jack runs as a background daemon, and you can use a GUI to control the connections to and from your hardware and software. The best software we’ve found for controlling Jack is Qjackctl, which is installed as part of the Ubuntu Studio package. Look for ‘Jack Control’ in the Multimedia menu. When the app appears, click on the ‘Setup’ button. Getting Jack’s set-up parameters right is often a matter of trial and error. Your settings will be different to ours, as they’re dependent on your specific audio hardware.

Make sure that the sample rate is compatible with your hardware. Most motherboard-based devices, and those from Creative and Asus, use 48,000Hz. Ensure ‘Real-time’ is enabled, as this was the reason for installing the enhanced kernel. Use the dropdown menu to the right of the ‘Interface’ field to select your audio device: this is normally going to be ‘hw:0’, ALSA-speak for the first device on your system. Finally, set the ‘Frames/Period’ size to 512. This is the size of the buffer used by Jack, and it has a direct effect on the audio latency of your system. The 512 setting works out at around 20ms from input to output, but you should be able to lower this when you’re sure that your system is working.

Save the configuration as a preset at the top of the window, then close the set-up window. Finally, when you get back to the main Jack Control window, click on the ‘Start’ button to start the background daemon running. If everything has been configured correctly, you should see a yellow ‘Started’ in the faux LCD panel, and you will now be able to start playing around with Jack. If you don’t see this word in the panel, click on the ‘Messages’ button to see a report of any launch errors.

Connect the apps

You’ve done the hard part, so now it’s time to put it to some use. Click on the ‘Connect’ button in Jack Control and you’ll see two panels in the Audio tab. The panel on the left lists the software and hardware sound generators, while the panel on the right lists the software and hardware outputs. At this point there is no other Jack software running, so under the system clients you should see only the hardware connections for your audio device.

To rectify this, look for an application called ‘Zynaddsubfx’ in your Multimedia menu. This is a rather excellent software synthesizer cunningly disguised by a silly name and dodgy UI. If you’ve still got Jack’s Connect window open when Zynaddsubfx launches, you’ll see an additional node in the output panel appear. This will connect its output to your soundcard’s direct output on the right-hand side. Click on the ‘VK’ button in the Synth window, and a virtual keyboard will appear. Press a few keys on this and you’ll hear a sound, hopefully with very little latency. Congratulations: you’re now using a real-time kernel and the Jack Audio Connection Kit to generate sound.

Get recording

To build a production environment, you’ll need to run a piece of audio workstation software that can manage all of these components. There are two widely used applications on Linux. Rosegarden is a KDE application that can record both audio and MIDI, and it can also use the new DSSI open-source synthesiser standard. However, our favourite is Ardour, a comprehensive recording environment that has more in common with Pro-Tools than Cubase. Ardour works exclusively with Jack to create a studio environment in software. If you launch the app from the Multimedia menu and create a new project, you’ll see the Jack connection window spring into life. Every track, effects send and audio bus in Ardour uses Jack. This is initially overwhelming, but it does mean that you’re free to use Ardour as you would a multitrack recorder in a studio, routing and re-routing audio between your various devices.

To record output from Zynaddsubfx, right-click in the lower part of Ardour’s main window and add a stereo track. Open the Jack connection window, select the two outputs from the synth and the two system output ports that they’re connected to, and click on ‘Disconnect’. Now connect each synth output to ‘Audio/In1’ and ‘Audio/In2’ under the Ardour client in the right panel. These are the two channels of the stereo track that we just created. Press the ‘Record enable’ button in the Ardour track followed by the big record and play buttons on the transport control, and play something on the synth. Ardour will now record the digital audio output from the synth, and you should be able to see some of this setup’s amazing potential.


Repair Damaged Drives With Linux

When you’re used to the world of Windows or OS X, Linux can seem a little unforgiving. Not only does command-line access hand over the complete keys to the manor to any unwitting user with access to the administrator’s account, there’s rarely a safety net should things go wrong. Despite advances in most Linux desktops (where the ubiquitous Trashcan safely buffers deleted files), you get no such protection from most system-specific configuration, installation and maintenance tools. And while it’s rare for anything to go wrong without your direct input, some accidents do happen, especially if you enjoy tinkering with the latest distro release each month. But this being Linux, there’s plenty you can do to dig yourself out of a hole, which is why it’s always a good idea to have a repair-worthy distribution close to hand when performing configuration and installation tasks.

One of the best developments in recent years has been the Live CD. These offer a fully functional Linux installation that runs from an optical drive. If you’ve got enough memory, you can even install new packages to the RAM disk just as you would when completing a standard installation. This makes a recent release of a Live CD-based installer like Ubuntu Jaunty the perfect system recovery tool. Not only does it include every package you might require, but because it runs from the optical drive rather than the hard drive, your data isn’t touched and there’s no chance files will be overwritten without direct input. It’s the obvious place to start when you get stuck.

Booting Linux

Probably the most common problem is when the Linux boot menu disappears or gets corrupted. The most likely reason for this is that a shared Windows installation has re-stamped its authority over your disk’s master boot record, overwriting the Grub boot loader with its own system-launching code. In these cases, you need to boot into a different Linux environment, either off a Live CD or from any other Linux booting media you can get hold of. The distribution you choose will also need to have Grub installed.

With Ubuntu, open the Terminal from the Accessories menu and type sudo grub. This will launch the boot loader with administrator privileges. From the ‘grub’ command prompt, type find /boot/grub/stage1. This Grub function searches every compatible drive attached to your system for the ‘/boot/grub/stage1’ file, which is used to launch the operating system. When the file is detected, it’ll output the drive and partition number of your lost installation using the format (hd1,0). Your output will look different, but it’s the drive number followed by the partition number of the Linux partition that you’re looking for. Grub should only be installed on a single partition on a single drive, so you shouldn’t find more than one version of the file.

To restore the Grub bootloader to your drive, type root (hd1,0), swapping the drive and partition number with the output you found with the previous ‘find’ command. Then type setup (hd1), swapping ‘hd1’ for your drive number. You should now find that your Linux partition and booting ability has been restored. The only potential problem is that this process could overwrite a Windows bootloader, and if Windows was installed after the original Grub installation, it won’t launch from the boot menu.

Booting Windows

Fortunately, adding Windows to your Grub menu is easy enough, and it’s straightforward to add any other OSes you want to boot from your system if you’ve got an example entry to work from. The key to the boot menu is a file called ‘/boot/grub/menu.lst’, and if you open this in a text editor, you should see that the formatting is relatively easy to understand. For instance, here’s a typical entry for booting a Windows installation off the first partition of the drive:

title Microsoft Windows
root (hd0,1)
makeactive
chainloader +1

You can make this Windows boot entry the default selection by adding a line that has ‘savedefault’ as the only word. Adding Linux entries isn’t quite so easy, as you need to get the path to both the ‘initrd.img’ (RAM disk) and ‘vmlinuz’ (kernel) files correct, according to how they sit on the Linux filesystem. The best way is to copy and paste an existing entry and change the paths accordingly. Older versions of Grub won’t support newer filesystem types. ext4, for instance, is a major upgrade to the standard Linux filesystem and it needs a specially modified version of Grub to boot into it. This could cause a problem if you installed a new Linux distro using ext4 alongside an older one with its older version of Grub. The only option in this case is to upgrade Grub, either manually or through a distribution that ships with the modified Grub, such as Ubuntu Jaunty.

Restoring the MBR

If you ever need to reinstate the Microsoft Windows bootloader onto your disk’s master boot record (MBR), you can use the Windows rescue disk and the ‘fdisk’ command. However, there’s also a handy open-source utility called ‘ms-sys’ that performs the process from a Linux installation. With the tool installed, typing ms-sys -w /dev/hda will create a Microsoft MBR on the first drive. But this may leave you with the opposite problem to the one we started with if Linux is on the same drive. To resolve it, you’ll need to reinstall Grub to get back to your Linux desktop.

Even if you can’t get to your Linux desktop, if you can get to the Grub boot menu then there’s still lots you can do to troubleshoot an installation, whether that boot menu is off a Live CD or a standard installation. Press [Escape] when you see the boot menu, and ‘e’ on the line causing you problems, and you can now edit each entry on the fly. These are the same lines we were editing in the ‘menu.lst’ file, and you can edit in-place options like the root partition for the operating system or the locations of the RAM disk image and kernel. Finally, rather than pressing ‘e’ for edit mode, try accessing the same command-line we used to search for the missing Linux installation. Just press ‘c’ to be dropped to the prompt. ‘Find’ is just one of around 30 commands that you can use to fix problems on your hard drives, list directories and even examine the contents of text files (the ‘cat’ command). For more details on what’s available and how to use it, type help.

Fixing a partition table

Another situation that initially appears to be catastrophic but can be resolved without data loss is if you happen to destroy the partition table of one of your disks. This is the kind of error that could render an entire disk’s worth of information useless, and it will also prevent your PC booting. But partition tables are stored independently of the data on the disk, and there are ways that you can rebuild them.


You might think that it’s particularly difficult to destroy your partition table, but there are ways that you can easily do this accidentally. The most common cause is if your PC is forced to restart while resizing a partition. You might find that the entire partition table is corrupt, despite the fact that no other partitions on the drive were touched by the process. Another likely scenario is that the wrong device name is used while installing Linux onto an external USB device with a command like ‘dd’, resulting in your principle hard drive becoming the incorrect destination for a write command. This can happen from Windows installations too, but Linux can fix both.

The command you need to use is called testdisk. This is one of the most useful commands we’ve ever had to use in an emergency, though it’s not installed on many Live CDs by default. With the latest Ubuntu Jaunty, you’ll need to install it from the Live CD environment using the package manager. After this is done, you should type sudo testdisk on the command line. If you don’t use the sudo command to run with administrator privileges, testdisk will ask for your password when the main page first appears. Before you get to that step, though, you’ll need to let the app know whether you want to create a log file or not. The correct answer is ‘Create’, but most people skip this stage and move straight on to the repair. Before you select the ‘No Log’ option, just remember that a log file can really help if testdisk fails or makes the problem worse. It’s the only way that you’ll know how far the along the process the repair procedure managed to get before it stopped, and where any fatal errors might have occurred.

Writing the new table

After choosing whether or not to create a log file, the next screen you’ll see will list the storage devices attached to your computer. The size of each disk should be correct, along with the unique identifier for the drive at the end of the line. Use the cursor keys to select the drive that you want to repair and press [Enter]. The screen that now appears is the most important, because you need to give testdisk some indication of the type of drive partition used on your system. In the vast majority of cases, this is going to be the first option – an Intel/PC partition. If you’re using a system other than this, then there’s a good chance you’ll already know what it is. You may be using the ultra-new EFI standard, for example, and this can be selected from the list.

After pressing [Enter] again, you’ll see a page that has another list of options. You need to choose the first one to analyse the contents of the drive. This will first display the registered partition details, if possible, before allowing you to perform a quick search for the table configuration within the data on the drive. There’s also an exception for Vista-based partitions, as these are handled slightly differently. If the search is successful, you will see the list of partitions discovered on your drive. If not, you’ll be presented with the option to perform a deeper search, but we’ve never found this necessary on a normal Intel Linux system.

From the page that lists the discovered partitions, make sure that the general parameters are correct – such as one of them being labelled as bootable – and press [Enter]. From this file list of partitions, select ‘Write’ to make the list of partitions you can see on the screen permanent. After a system reboot, you should find your drive fully restored, although there’s a chance you might need to install the Grub bootloader.

Back up your data

Before you start messing with your drives in an attempt to rebuild a working system, make a copy of the data on the drive. There are many ways of making a backup in Linux, but the easiest is to use the ‘dd’ command. This makes a bit-for-bit copy of what’s on your drive, creating the Linux equivalent of a disc image. This means that you can work on this image to restore lost or deleted files without even touching the original disk. The ext3grep command we talk about in the ‘Restore deleted files’ box can use the output of ‘dd’ as its raw input, for example. Unlike ext3grep, ‘dd’ is easy to use. Just execute the command with a source followed by a destination: dd if=/dev/sda1 of=sda1_image.bin, for instance. The only caveat is that ‘dd’ will do exactly as you ask, overwriting anything it finds without any pleasantries. This is a big cause of overwritten boot blocks and MBRs on Linux. The command is also difficult to use because there’s next to no output to tell you what it’s doing, and it can take a while if you leave the block size at its default value. Sometimes the only way you can make sure ‘dd’ is making a copy is to check that the activity light is flashing.

Solving Error 18

One of the more problematic Grub errors is Error 18. It’s a throwback to a time when BIOSes couldn’t detect the size of a large drive properly. There are a couple of solutions to this problem. One is to try changing the drive order in the BIOS; the other is to create a smaller root Linux partition on the drive, as partitions over 500MB in size have been reported to cause the problem with certain BIOSes.

Restore deleted files

Thanks to the way modern Linux filesystems like ext3 use a journal to document file management, there’s no ‘undelete’ command that can simply restore lost and accidentally deleted files. Instead, you’re often left to trawl through the raw blocks of code accessible through the device nodes on your filesystem. But that hasn’t stopped some developers from trying to replicate it. One developer was particularly flummoxed when he accidentally deleted his home directory. Almost a year of work went with a careless execution of the ‘rm -rf’ command. But rather than spending the next few weeks lamenting its loss at a local bar, he spent them creating a tool to restore all those lost files. That tool is called ext3grep, and it’s about as close to an undelete command that us Linux users will ever get. But be warned: the price you pay for file resurrection is complexity.

Ext3grep is likely to be hosted on your distribution’s package repository. Before using it, you’ll need to make sure no processes are accessing files on the partition that held the file you want to recover. It might be easier to simply reboot to a fail-safe or administration mode, or even a Live CD if you need to get at the root filesystem. You then need to use ‘ext3grep’ to search for the missing file. The easiest method of recovering a file called ‘test.odt’ on ‘/dev/sda1’, is to type ext3grep /dev/sda1 --recover-file test.odt. Ext3grep will then search through each block of the device looking for directories, before diving in and looking for references to your file. If it can be found, it will be placed in the RESTORED_FILES folder.


Brilliant Buildings


-Stranges World